# Implementing Redis Task Queues and Deploying on Docker Compose
In this blog, I will be showing how to implement Redis Task Queues in Flask and how to deploy it on Docker using compose.
### First we need to understand what are Task Queues? Where do we use them?
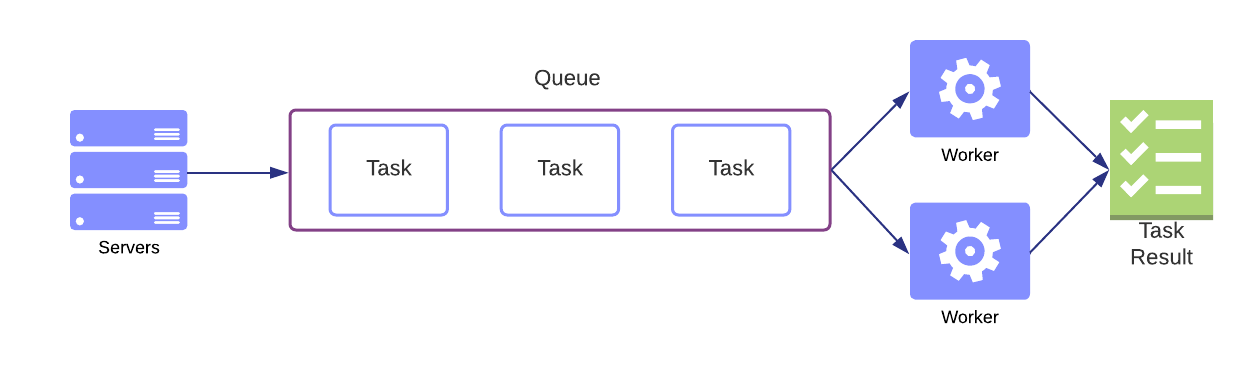
According to Google Cloud,
> Task queues let applications perform work, called tasks, asynchronously outside of a user request. If an app needs to execute work in the background, it adds tasks to task queues. The tasks are executed later, by worker services.
To put it simply Task queues remove the load of executing tasks (like sending mails, large calculations) from the webserver and are run independently on a background service called workers.
### ELI5 (Not really)
Imagine this scenario. You built a web application that sends greeting messages to provided email addresses. You are using the `send_email(mail_id)` method you built for sending an email that takes 5 seconds per email to send the greeting. Your application works great but there is one problem. Whenever someone sends the greeting they will have to wait for the server to process the previous request which takes seconds 5*(number of emails). This means you need to wait a while before you can use your application again.
You can fix this by implementing Task Queues. Where each call to `send_email(mail_id)` is a single task. You create a "Worker" that is independent of your Web Server and is responsible for executing the tasks. Now you can instantly access your web server without having to wait for the previous greeting to be sent. The greeting still takes 5 seconds each to send because you built a pretty bad function but you don't have to wait to use your web app each time you use it. If you decide to scale your application you can just add more workers instead of scaling your entire web application.
### What is Redis and Redis Queue?
In simplest terms [Redis](https://redislabs.com/) is a service that stores key-value pairs in your RAM. It is widely used as a caching layer that stores the frequently accessed data from your database so you don't have to query your database too often (because it's slow and expensive) and directly read the data from cache memory.
**Redis Queues** is a python library implemented using Redis, it is used for queuing tasks and creating workers easily. You learn more about it on their [official website](https://python-rq.org/). Note that a "Job" is the same as "Task" I use them interchangeably below.
## Implementation using Flask
In this blog, I am going to demonstrate a bare minimum implementation of Redis Queues using Flask.
Here is the directory tree that I am starting with:
```bash
.
├── app
│ ├── api.py
│ └── main.py
└── redis
```
First, let us install the libraries required. Spin up your virtual environment and install
```bash
pip install flask Redis rq requests
```
Add the requirements to `app/requirements.txt` using
```bash
pip freeze > app/requirements.txt
```
Now that we have our tools handy, let's start building the application. For simplicity, I am going to create an application that fetches an image of a cat from an API, and to simulate the long response I am going to add an artificial delay. Let's look at our task function.
```python
def getCatImage(delay):
# Simulate Delay
time.sleep(delay)
url = requests.get(
"https://api.thecatapi.com/v1/images/search").json()[0]['url']
# Result
return url
```
We will store this function in `api.py` in `app/` directory. Now, Let's move on to the Flask app. This is going to be a fairly simple Flask application with two endpoints, One for queuing the tasks and another for fetching the task queues (and view result).
Configuring the Redis Queue and importing our `api.py` into the flask app.
```python
from flask import Flask
import redis
from rq import Queue
from api import getCatImage
app = Flask(__name__)
r = redis.Redis(host='redis', port=6379)
q = Queue(connection=r)
```
Notice a couple of things here, I am importing the function from our `api.py` which we will use to queue the tasks and the Redis queue configuration. `r = redis.Redis(host='redis', port=6379)`. here the `host` is actually the URL of your Redis server, if you're running Redis server on `localhost` then you need to change it to `localhost` but since we are using Docker we will instead use the name of our service as host, the default port for Redis is 6379 but if you changed it to something else then you will have to change it here.
Now, let us create the two end points. First is the Task queuing endpoint
```python
@app.route('/')
def index():
task = q.enqueue(getCatImage, 5)
n = len(q.jobs)
html = '
'
for job in q.jobs:
html += f'{job.id}
'
html += f'Total {n} Jobs in queue '
return f"{html}"
```
Here, I am creating a new task and adding it to the queue whenever a request is made to the root URL (`/`). The `getCatImage` is a function for the task and `5` is the args for the function, this translates to `getCatImage(5)`. In our function 5 is actually used to simulate 5 seconds delay.
I am also creating an Html component to show the number of queued tasks (jobs) and a link to each task (job), here the `q.jobs` actually stores all your tasks as objects in a list, hence we are iterating through `q.jobs` to get the id of each task (job).
Creating an endpoint to fetch a particular task based on id
```python
@app.route('/job/')
def getJob(job_id):
res = q.fetch_job(job_id)
if not res.result:
return f'
The job is still pending
ID:{job_id}
Queued at: {res.enqueued_at}
Status: {res._status}'
return f'

ID:{job_id}
Queued at: {res.enqueued_at}
Finished at: {res.ended_at}'
```
To put it simply what is happening here is we are taking a parameter `job_id` and fetching its data like the result, status, start time, and end time from the queue. In the end, when the job is completed we are displaying the cat image that was fetched and the time the task finished executing. Apologies for the messy HTML but I did not want to create a template for this small application.
That's it! It is a very small application. Now it's time to Dockerize it.
If you don't know what is Docker I suggest you read my [previous blog](https://blog.abbasmj.com/dockerizing-flaskmysql-application-using-compose) where I explain Containers, VMs, Docker, etc.
### Dockerizing the Application
As you probably guessed we need multiple containers here, 3 to be specific
1. Flask Application
2. Worker
3. Redis Server
I am going to use [Docker Compose](https://docs.docker.com/compose/install/) which makes it really easy to deploy multiple containers at once.
Let's build the Dockerfile for the flask application first
```YAML
FROM python:latest
COPY . /app
WORKDIR /app
RUN pip install -r requirements.txt
CMD ["python", "main.py"]
```
It's plain and straightforward, Copy the `app` directory, Install `requirements.txt` and run the `main.py` using python. Note that this Dockerfile will be in `app/`.
Let us build the `docker-compose.yml`
```YAML
version: '3'
services:
redis:
image: redis:4.0.6-alpine
ports:
- "6379:6379"
volumes:
- ./redis:/redis
flask-app:
image: app-image
container_name: flask-app
build: app
restart: always
ports:
- '5000:5000'
volumes:
- ./app:/app
worker:
image: app-image:latest
depends_on:
- redis
command: rq worker --url redis://redis:6379
links:
- redis
```
This may not look like it but it's actually very plain and straightforward as well. Let's start from the beginning. We start by declaring our compose version which in this case is `3` then we directly move on to creating our services (containers). First is Redis, Just install the image `redis:4.0.6-alpine` from the hub, map the port `6379:6379`, and mount the `redis` directory.
Second, `flask-app`. Here we are going to give a name to the image which is `app-image` because we are going to use it in our worker. Give the container a name. Build the Dockerfile from `app/`, map the ports `5000:5000` and mount the `app/` volume.
Finally, We are going to create a container for a worker. Here we use the same image as flask-app because that's where `rq` is installed, next we link it to the `redis` container and make sure it starts after the `redis` container (because rq depends on redis-server) and run the command `rq worker` with args `--url redis://redis:6379` which specifies our redis-server url
That's it, You have everything now. Here's how the final directory map looks like
```bash
.
├── README.md
├── app
│ ├── Dockerfile
│ ├── api.py
│ ├── main.py
│ └── requirements.txt
├── docker-compose.yml
└── redis
```
### Let's run it.
Building the compose
```bash
docker-compose build --no-cache
```
and running the containers
```bash
docker-compose up -d
```
You should be able to see your application live at *localhost:5000*. Reload it a couple of times so you can queue multiple tasks.
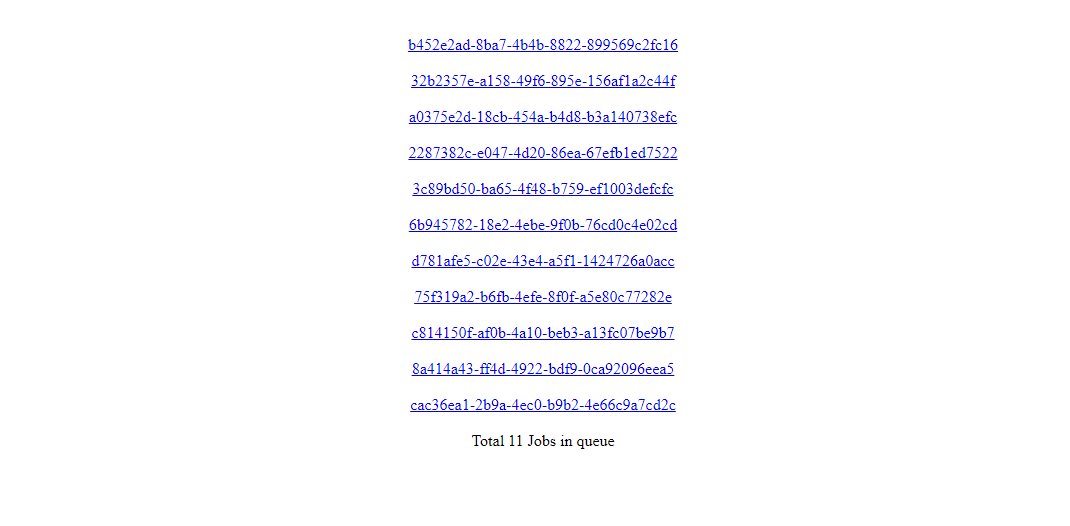
I refreshed it 11 times as you can see there are 11 Jobs queued. Let's click on one.

You can see this task has not started yet and is still pending, The status will change to *started* when this task starts executing. Let's reload it after a couple of seconds and see if it has finished running the task.
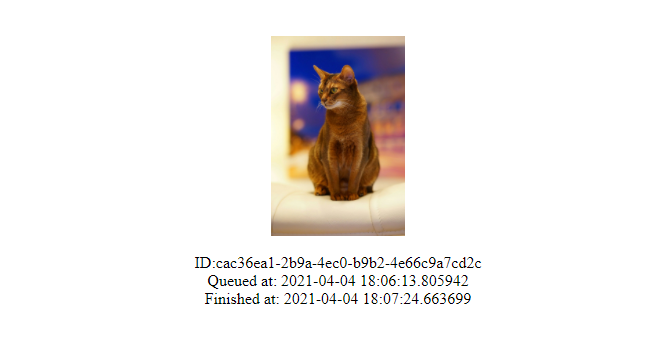
It has finished executing! and there is our Cat! You can see when it was queued and when it finished executing too.
That's all! You just saw a bare minimum application implementing Redis queues and deploying them on Docker using compose.
## Conclusion
In this blog, you learned about Task queues, Redis, Redis queues, how to implement Redis queues using Flask, and how to deploy them as multiple Docker containers using compose. All the code used above is available at:
%[https://github.com/iam-abbas/Redis-Docker-Example]
For the next blog, I will be sharing one of my projects which is **Tracking Stock Market Trends on Reddit** where I used a combination of Reddit API, Yahoo Finance API, and some interesting NLP implementation to analyze Stocker Market Trends using Reddit.
---
Subscribe to my newsletter if you are interested in learning more about DevOps, Full-Stack Development, Data Science, Machine Learning, and as well as Freelancing. Follow me on Twitter [@abbasmdj](https://twitter,com/abbasmdj).